Merida Silex 700 Bottom Bracket: You Need a BBR60
Background
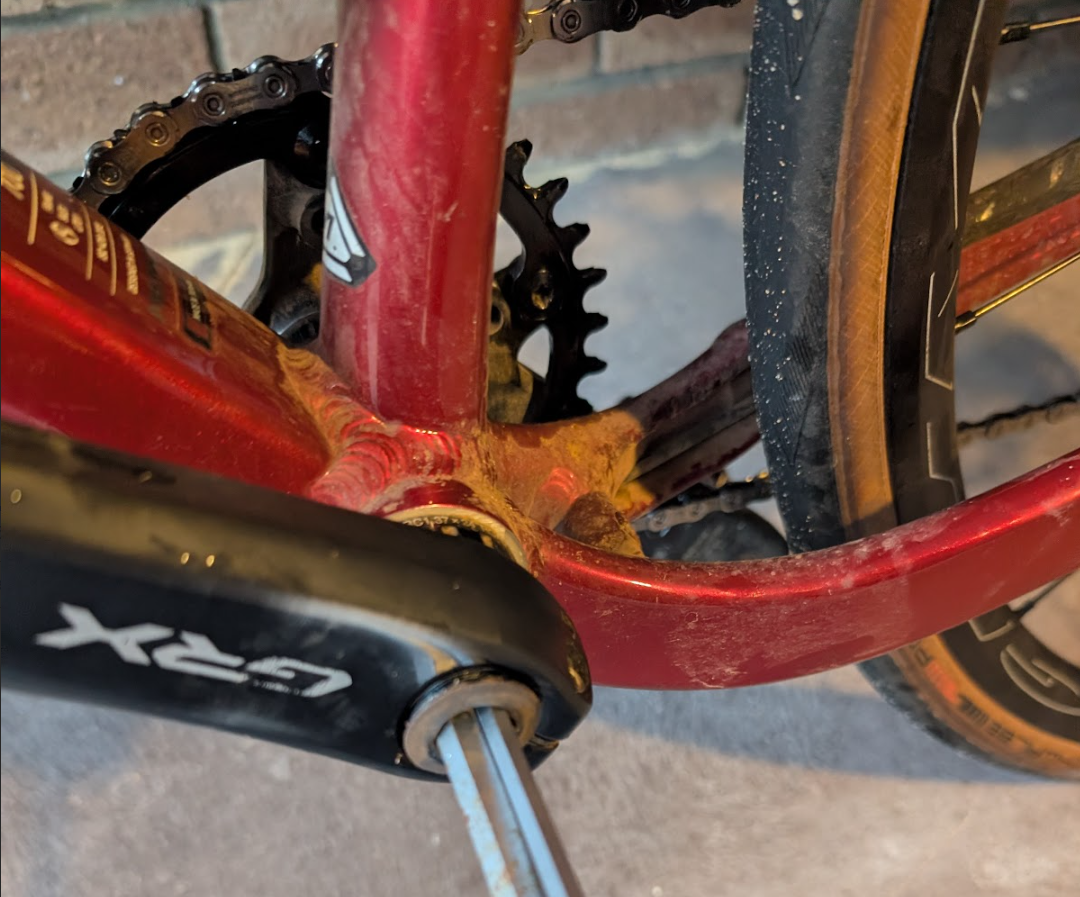
About to depart for a 3000km bicycle tour of New Zealand, I’m in a mad maintenance rush, replacing all the consumable parts on my Silex so nothing goes wrong on tour. In theory. (Ha!) The bottom bracket (BB from here on) hasn’t given me trouble yet—bearings sound fine, feel fine—but the bike’s a couple of years old with a dubious maintenance history since I bought it second-hand. The thought of having to get it replaced on tour if it decided to die on me after 2000 or so km of muddy trails, either by dragging along all the necessary tools with me, or paying a bike shop to replace it, didn’t sound particularly appealing.
Simple job, right? BSA 68mm, Shimano GRX groupset, Hollowtech II—in and out, 20-minute adventure. The parts arrived, I get to work and… things didn’t fit. At this point I should mention: BBs have been one of the major recurring annoyances throughout my amateur bicycle mechanic career. A short list of the various issues I’ve encountered…
- Is that noise the bottom bracket? (It’s never the bottom bracket…until it is)
- Press fit bottom brackets in general (what a nightmare), and buying a BB30 compatible crank, when I should have bought a Hollowtech crank
- Bad shifting caused by a bad chainline caused by… bad bottom bracket spacing/missing bottom bracket spacers. Lucky this was on a friends bike otherwise my bike probably would be in the bottom of a river by now.
- Accidentally buying a Hollowtech/BSA BB when I should have bought a square taper bottom bracket
- Accidentally buying a square taper BB when I should have bought a Hollowtech/BSA BB
Merida Silex BB Specifications
The parts specification for the Merida Silex 700 (available here) lists the bottom bracket required as “BSA bottom bracket standard.” As far as I can tell, this applies to all Merida Silex 700 models from 2023 onward. Generally the standard is 68mm for road bicycles, and 73mm for mountain bikes. A quick measurement with my vernier calipers showed that the shell width on my bike was 68mm. Perfect! The groupset on the Silex is a Shimano GRX810 groupset, and I could see the existing bottom bracket was a Shimano Hollowtech 2 Bottom Bracket. Everything checked out. Or so I thought.
Replacement attempt 1
After receiving the new BB, I began removing the old one. This process is generally fairly straight forward. First up, remove the crank—here’s a great guide from Park Tool here. Unfortunately however, I had lost my TL-FC16 crank arm tool. A useful trick if you don’t have the tool is to use an 8mm and a 6mm Allen key like so to remove the cap.
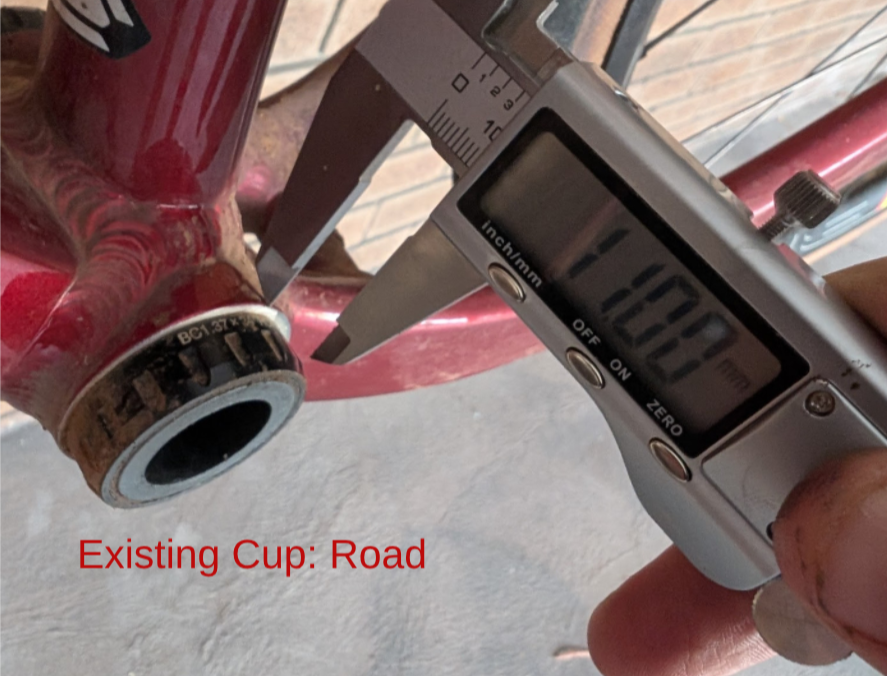
After removing the crank arm, I tried to remove the bottom bracket and this is where I got stuck. As shown below, my Hollowtech 2 BB removal tool was too large for the bottom bracket. How could this be? It turns out, that there are in fact two different types of BSA 68mm threaded Hollowtech 2 bottom brackets…
- Mountain bike (most common, lots of models)
- Road bike (BB-RS500 Tiagra, BBR60 Ultegra and maybe others)
And the existing BB on my bike was the road bike version. Why the difference? Your guess is as good as mine, but it’s bicycles, so probably something about saving 3 grams.

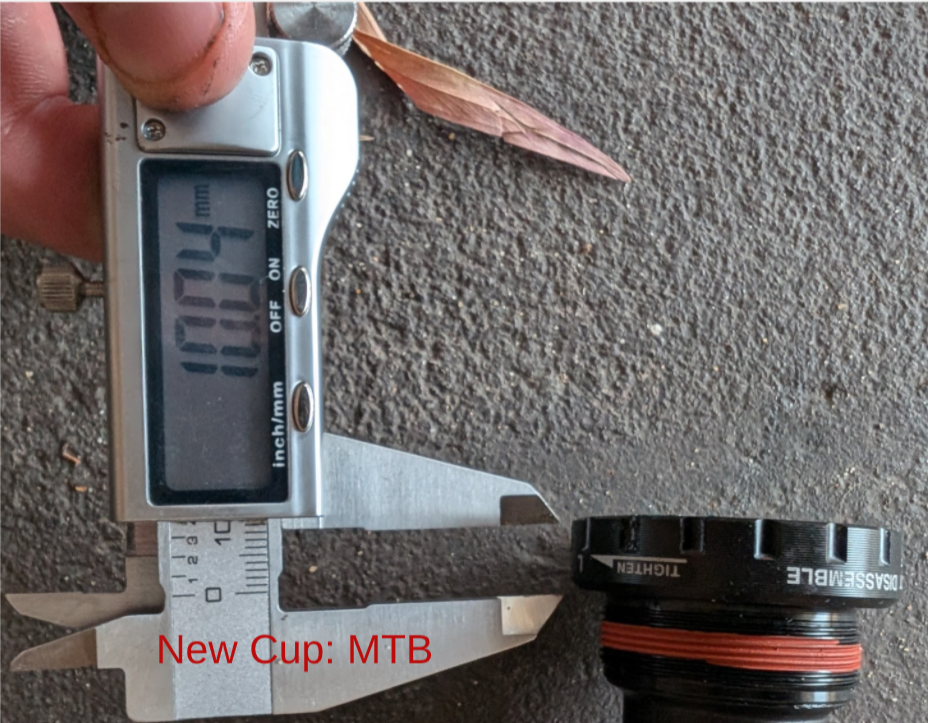
If, like me, your first thought is “can I make the wrong part work?” rather than giving more money to Big Bottom Bracket, a word of caution… as shown below, the width of the road and mountain bike cups are actually different.
- 10mm cup width for MTB bike version
- 11mm cup width for road bike version
What this means is that you’ll need to install a 1mm spacer either side of the MTB bracket to avoid any potential chainline issues. Tobias Feltus has a detailed writeup with measurements on this exact issue here. It was at this point I gave up, and ordered the correct parts including the BBR60 Ultegra BB.
Tools and Parts
- A new Shimano TL-FC16
- SM-BBR60 bottom bracket cup tool. Model number Shimano Tl-FC25
- BBR60 Ultegra BB
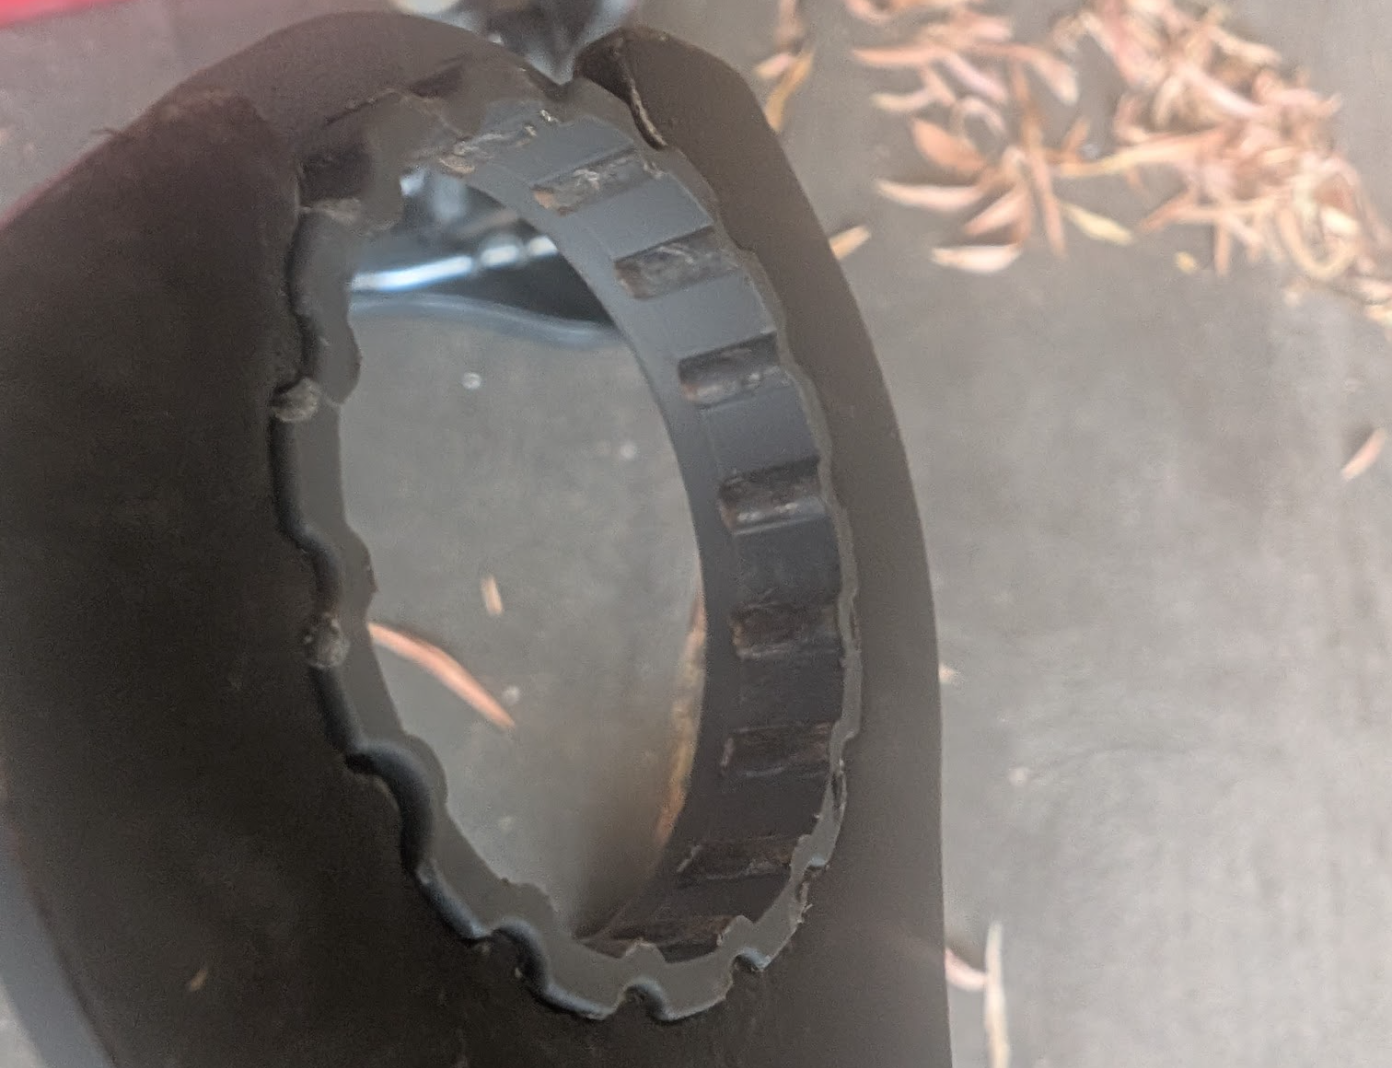
There are a few different tools you can potentially buy to remove the BBR60 style bottom bracket. In my research I found the cup style (Pushys Link) that attaches to a 1/2” drive socket and a double-sided generic BB tool - Amazon which promises compatibility with a wide range of BB styles. I went with the TL-FC25 since it slots into my existing Hollowtech II tool and cost all of $4. In retrospect, I probably would try the Bikehand tool from Amazon, as I wasn’t particularly impressed by the adapter. Below you can see the engagement mechanism after some… enthusiastic persuasion getting the old BB out. Grease your threads, people!
BB Replacement & Lessons Learned
Once I had the right parts and the new BB, replacement was easy. As always, check out the relevant video from Park Tool here when removing and installing your own bottom bracket. Overall, a few lessons learned…
- Examine the existing BB more carefully—mine literally had “road” stamped on the cup. Take measurements with calipers.
- Watch the Park Tool video first. They actually warn about this tool/BB selection issue—I just didn’t watch it until too late.
- Test-fit your tools before disassembly. Just checking whether the BB tool fits while everything’s still attached would’ve sent me down the right rabbit hole immediately.
Oh well, a good learning experience anyway! I hope this helps someone.